
Successfully Grow Alocasias From A Bulb/Corm
Have you ever repotted an Alocasia and noticed these bulbs hanging from the roots?
Those are corms, and your only way to duplicate your Alocasia. There can be many ways you’d want to create a new alocasia plant.
For me, Alocasias haven’t been the easiest houseplant to care for. They’re pretty picky and need environments to be almost exactly what they want, or else. It’s easy to send your Alocasia into dormancy when conditions aren’t ideal for the plant.
If your Alocasia has gone dormant, check out my Wake Up Your Plants From Dormancy blog here.
I like to think of taking cuttings, or in this case – a corm to be a way to create more of your favorite plant, or to have a backup in case things go south. I’ll go over step-by-step instructions on how you can successfully grow Alocasias just from a bulb/corm.
Alocasia Propagation Methods
Alocasias can’t be propagated as easily as a houseplant like a Pothos. Alocasias don’t have nodes to plop into water. So, you may be wondering
“How do I even propagate a Alocasia without nodes?”
Alocasias can only be propagated by division. This basically means that in order to create another copy of that plant you’ll need to grow a completely new one first. These new Alocasia plants only come from one place – a corm. You can either wait for a new sprout to emerge from the soil, or you could wait until your Alocasia needs to be repotted and harvest those little bulbs.

Corms will only develop roots and new growth in super high humidity, so placing the corms into a terrarium or a jar (big enough for it to grow a bit) will set you up for a successful propagation.
What Is A Bulb/Corm?
Essentially a corm is seed like, in the way a new plant will sprout from the bulb. They are small and round with points on each end. They are also covered in a brown shell resembling the inner shell of a peanut, it can be super thick or thin.

The points on each end are either the point where the bulb was attached to the mother plant and where a new leaf will emerge.
The bulb/corm might still be attached to the mother plant under the soil, which is sending nutrients to the bulb to grow. But corms don’t need this to grow into new plants. You can simply detach it from the mother plant or even in some cases its already detached and place it in a propagate substrate – like sphagnum moss.
Steps For Growing Bulbs/Corms
What you’ll need:
- Alocasia plant
- Disinfected scissors/shears
- Pre moistened sphagnum moss
- Propagation vessel (I’d recommend a clear one, to see root growth)
- A terrarium/propagation box
- Water & Towel (to clean off bulbs)
- Tool to remove shell
Step 1:
Once your Alocasia is carefully removed from the pot, locate the corms. They will be nested in the root ball. You can also find some in the soil if they have become attached.
Step 2:
If the corms are still attached, snip right underneath the corm.
Step 3:
Remove the outer shells. Some shells can come off easily and some may need to soak. If you have a stubborn corm shell soak it in room temp water overnight. This should soften up the shell.
Step 4:
Once all the brown outer shell is removed, clean off the corms to reveal a creamy white bulb.
Step 5:
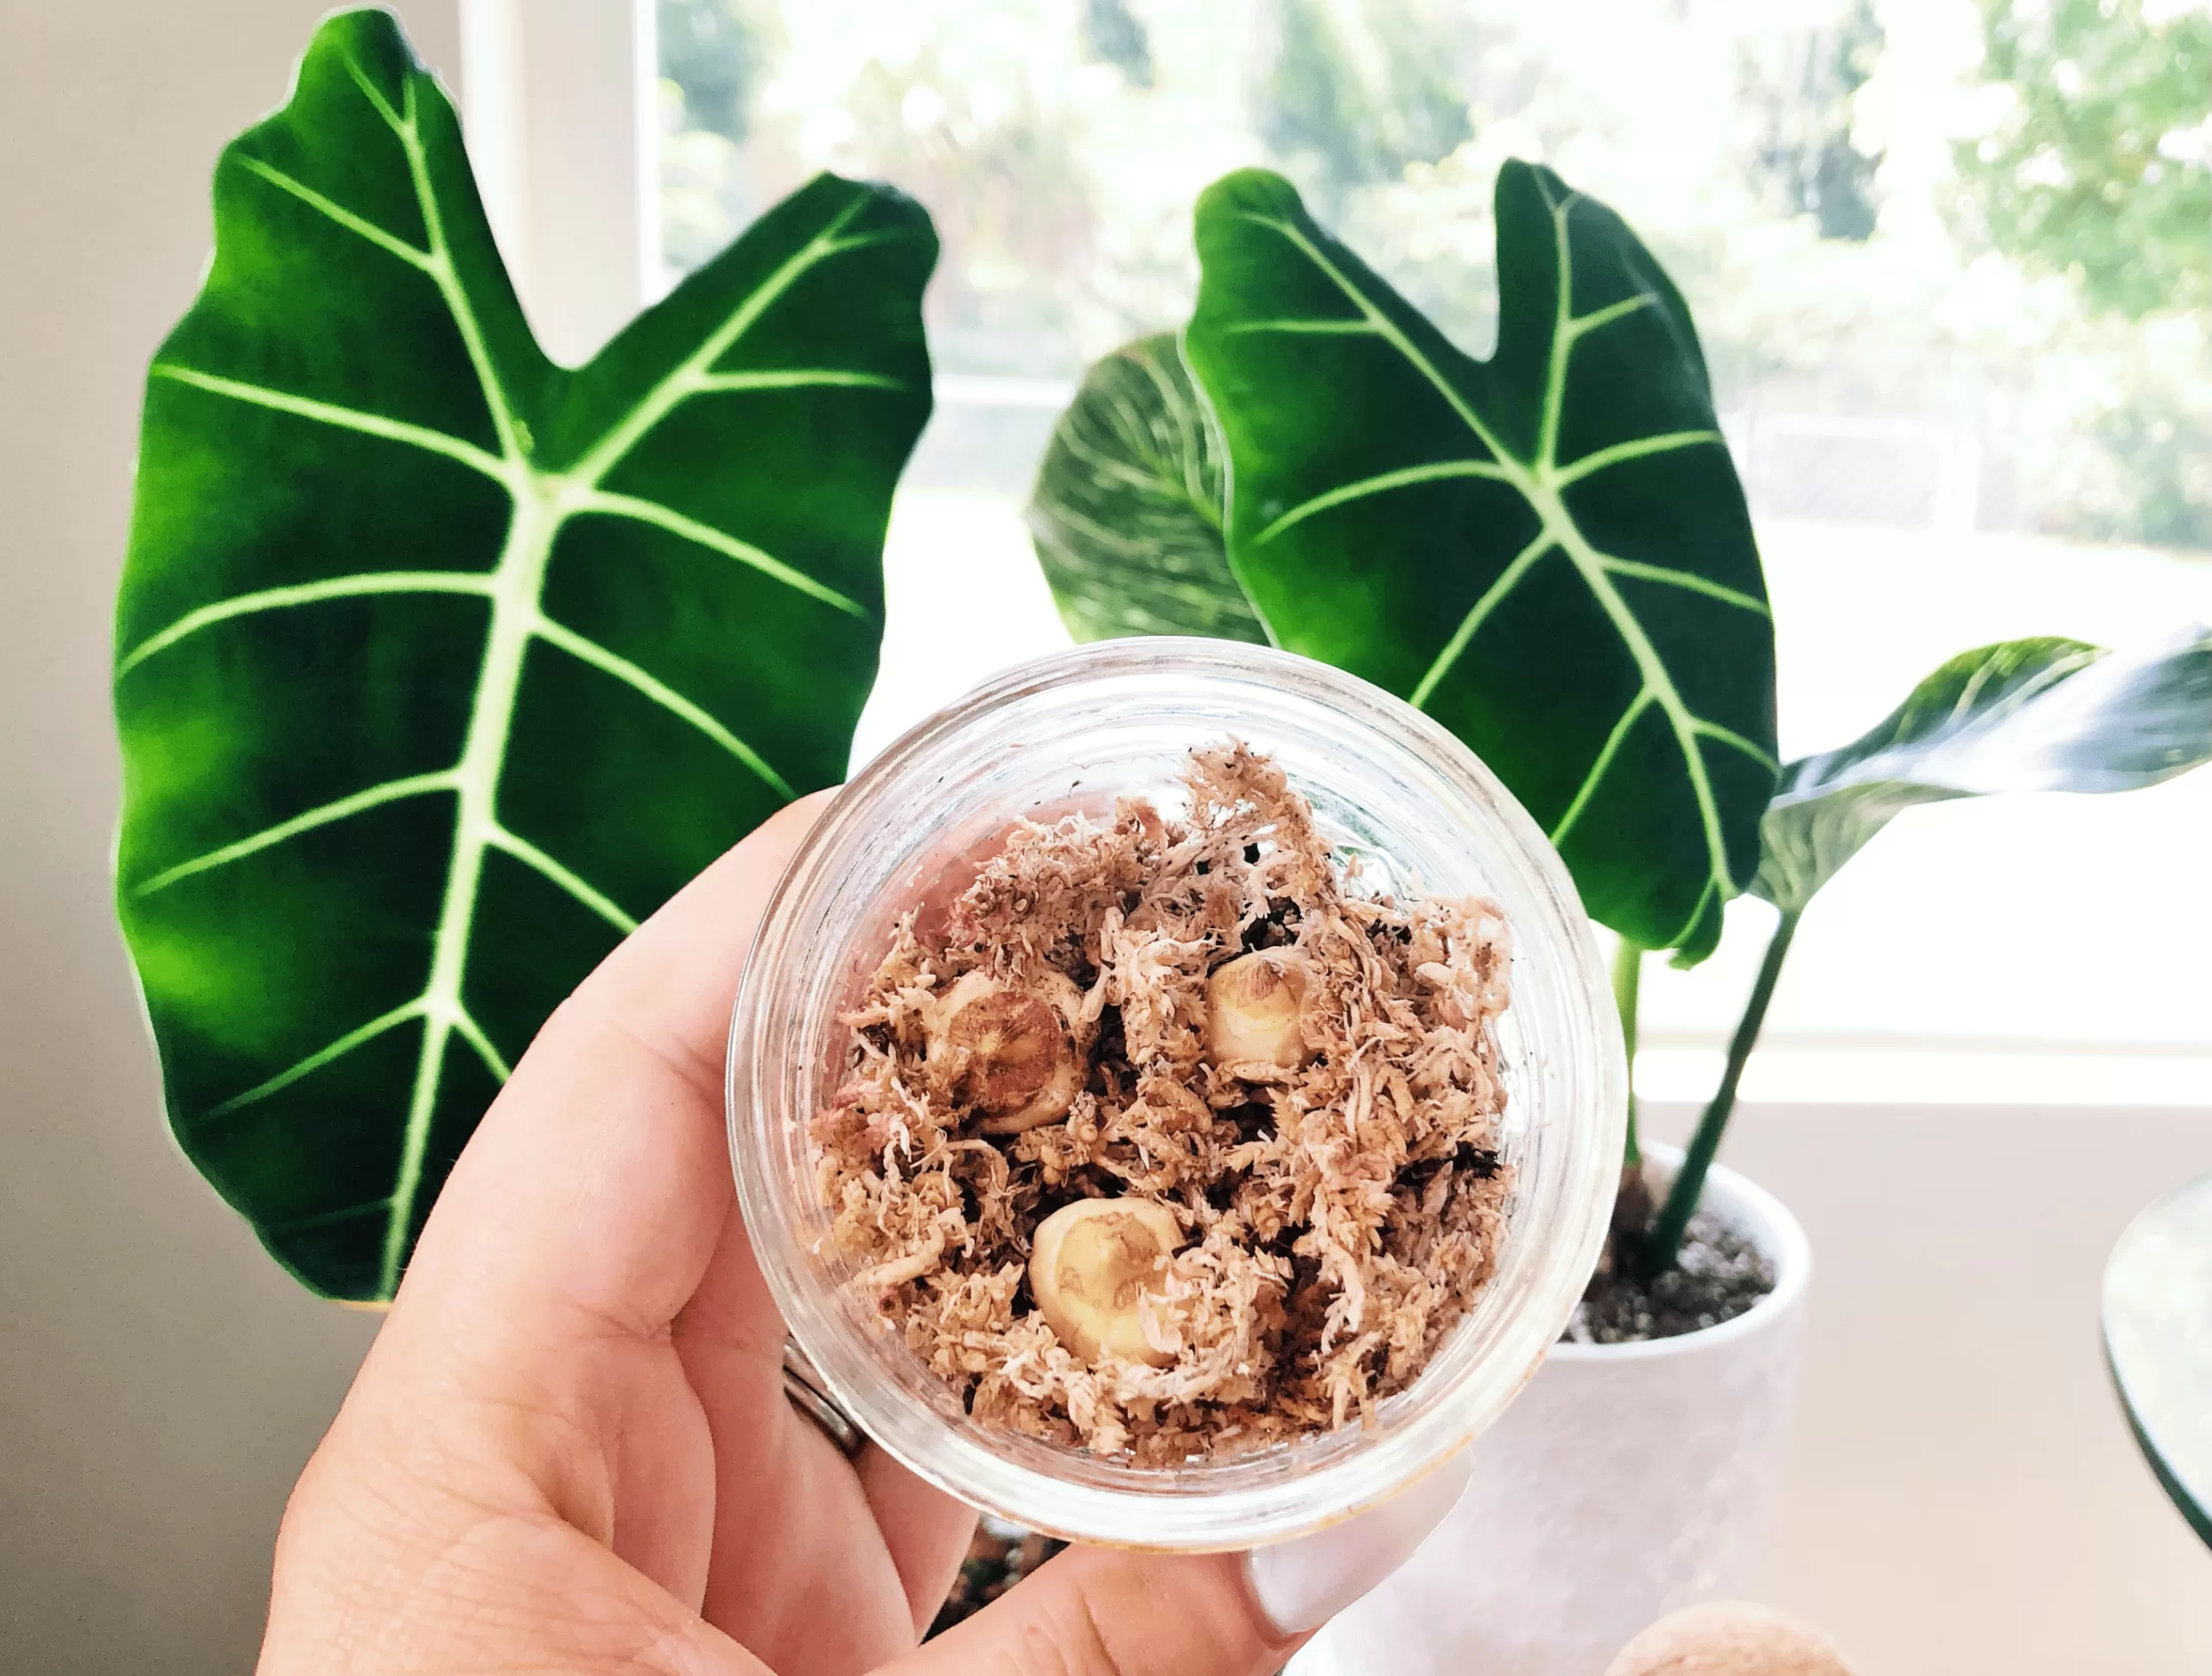
Take your pre-moistened moss and place in the propagation vessel. Make a little indentation in the moss with your finger where the corm will go
Step 6:
Place the corm/bulb with the growth point facing up. Make sure the part that was detached from the mother plant is down into the moss.
Step 7:
Gently push the moss on the sides of the corms to make sure they don’t roll around or fall over on the side.
Step 8:
Put a small amount of moss on top of the corms to keep the entire vessel moist. This will also help maintain that high humidity these little bulbs need.
Step 9:
Place your vessel in a closed container, like a propagation box or a terrarium. When you find a new home for these bulbs to grow, make sure they are also in a bright area with no direct sun rays.
Step 10:
Over the next few weeks, you’ll start to notice roots growing, and over time a new leaf will sprout. Once the roots have developed and leaves are growing you can now replant your Alocasia in your growing medium and enjoy your new plant!

Tips:
When you grow Alocasias from a bulb/corm, I would suggest using sphagnum moss placed in a terrarium or a propagation box.
Biggest advice I can give with this process is – be patient. This will be a slow experiment, but well worth it in the end.
A Little Piece Of Mind
Alocasias for me have been a hit or miss, so I make sure I snag that insurance policy in the form of a corm/bulb to make sure I can have a clone of that plant if we decide to part ways.

Collecting and harvesting corms/bulbs is honestly – pretty fun. Especially watching them grow. To grow Alocasias from a bulb/corm can be tricky and trying at times. But after you get the hang of it, you’ll be propagating corms like crazy.
Just be careful – you might find yourself with a house full of Alocasias before you know it.
